
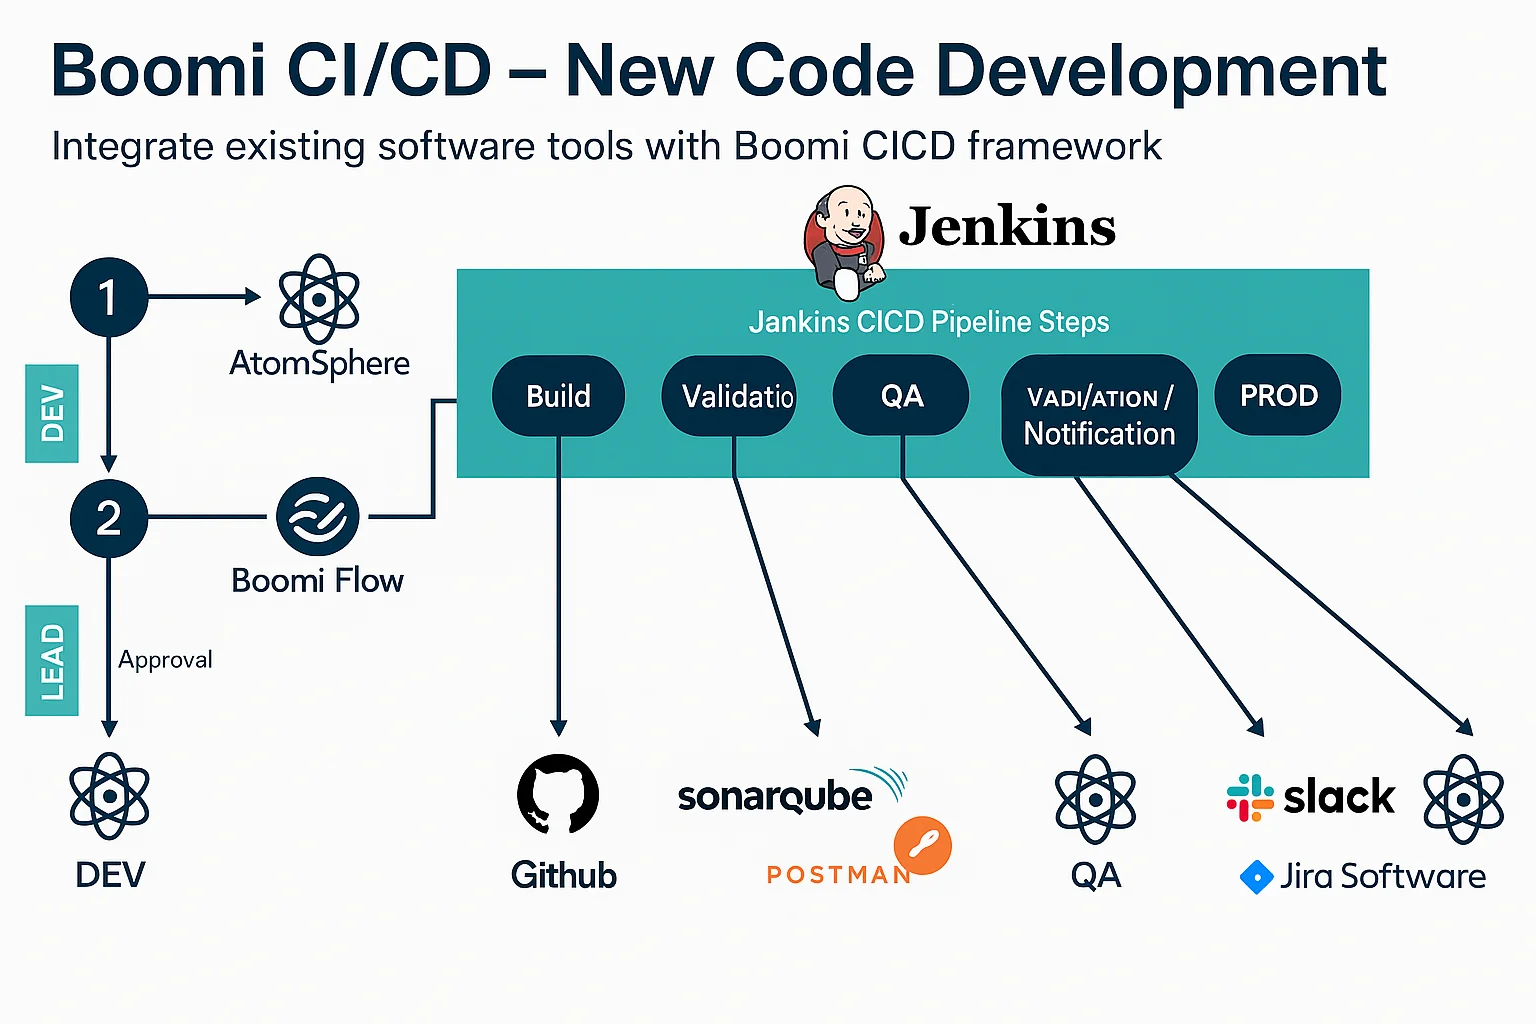
Dell Boomi is an Integration Platform as a Service (iPaaS) that enables organizations to connect applications, data, and processes seamlessly. As businesses increasingly adopt agile methodologies, Continuous Integration and Continuous Deployment (CI/CD) have become crucial for maintaining efficiency and minimizing deployment risks. However, implementing CI/CD in Boomi presents unique challenges due to its cloud-based architecture and proprietary deployment model. This blog explores these challenges and provides practical solutions to streamline CI/CD workflows in Boomi.
What is CI/CD?
A CI/CD pipeline automates the process of building, testing, and deploying code, ensuring faster, more reliable, and consistent software delivery.

Key Challenges in Implementing CI/CD for Boomi
One of the primary challenges in implementing CI/CD for Boomi is the complexity of managing deployments across multiple environments. Since Boomi does not natively provide out-of-the-box CI/CD support, developers often struggle with version control and automated testing. Additionally, ensuring consistency and error-free deployments can be difficult, as manual deployments often lead to discrepancies between environments, increasing the risk of failures. Another significant challenge is security and compliance. Organizations must ensure that deployment processes adhere to governance policies and security best practices, including access control and data protection.
Implementing CI/CD in Boomi
Boomi is a powerful integration platform. While it offers a wide range of features, certain functionalities might not be readily available in certain scenarios. The extensive collection of Boomi Atomspher APIs allows users to automate tasks like creating package components, component deployment, monitoring, and more. Boomi’s AtomSphere API, developers can script and streamline deployment pipelines, ensuring that integrations move from development to production with minimal manual intervention.
Utilizing these APIs, we have developed CI/CD implementations that enhance code quality and facilitate test-driven development. This blog goes into more detail about the reference implementation and provides example code to assist with it.
There are two primary components:
1. Atomsphere API – Enables automation of Boomi deployments and management.
2. Version Control & CI/CD Tools –While GitHub is commonly used, alternative tools like GitLab, Bitbucket, or Azure DevOps can also be integrated.
Atomsphere API
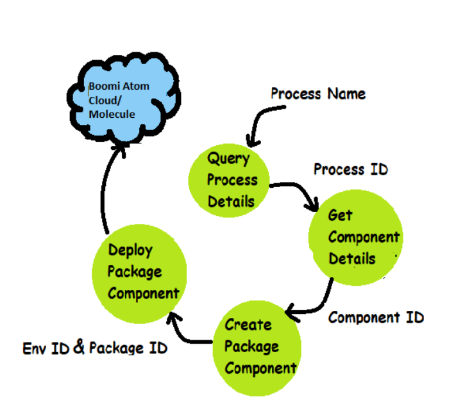
Please refer to the images below for the mentioned use case. In this use case, the AtomSphere platform API is at the core. To use AtomSphere APIs, the Boomi AtomSphereAPI connector is necessary. By using this connector, we can create a process responsible for creating a package and deploying it in the desired environment.
When automating this process, the Env ID and packaged ID must be passed to process deployment and the Component ID for packaged component creation. The flow diagram helps you understand the implementation in more depth.
Using the AtomSphere API connector requires following a sequence. We might need multiple AtomSphere connectors to extract different values. The sequence of the Boomi Atomsphere API connector for our use case is shown to the right.
In the Flow Diagram, we are using the query action in the AtomSphere API connector. This process requires various parameters, which are mentioned below according to their dependency.
You can set process name by copying the Name of the process from the Process Component and Env Id can be fetched from the Boomi’s Atom Management.
The rest of the dependent parameters are shown in the diagram (Boomi: Process overview).
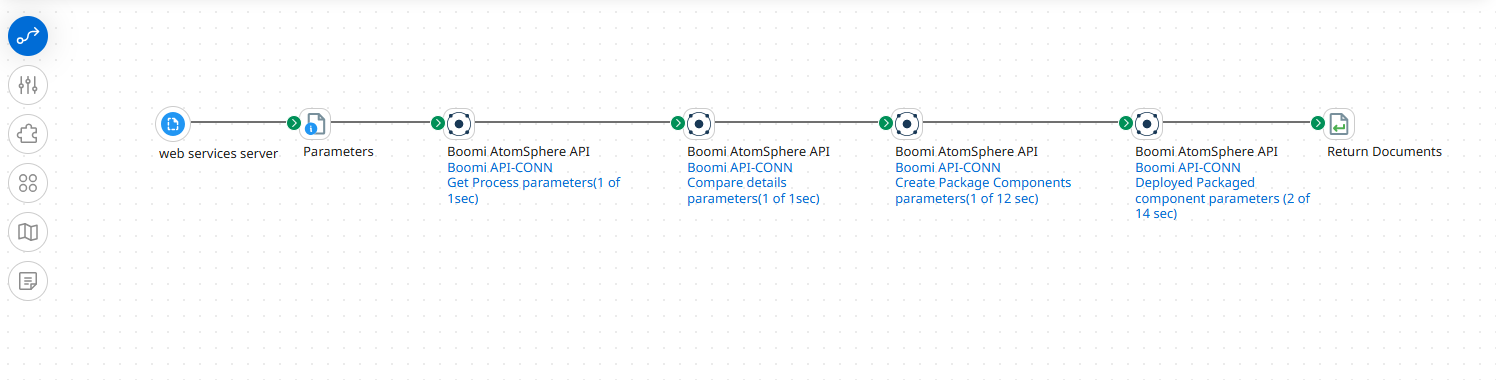
The functionality of each Atomsphere API Connector shown in the image is explained below:
1. Retrieve Process Details: Use AtomSphere API to query process details
2. Fetch Component Details: Obtain the process ID and fetch component details.
3. Create a Packaged Component: Generate a package using the component ID.
4. Deploy the Component: Deploy the package to the desired environment using Env ID.
The Process should be web service server-based and use the Set property shape toset the value of process name and Env ID dynamically using the dynamic process property.
If you want to enhance the CICD process, you can utilize any source-controlling tool anddeployment pipeline. Here I have used GitHub as a Source control tool and GitHub Actions as a deployment pipeline.
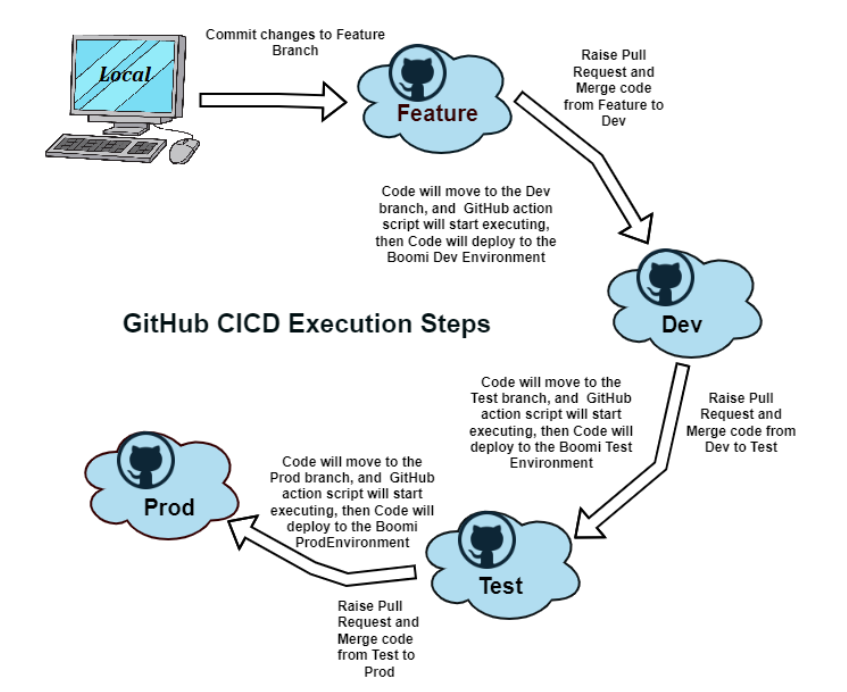
GitHub CI/CD Implementation
Leverage GitHub Actions to manage the CI/CD workflow for deploying a Boomi process. Organizations typically follow environment-specific branching strategies (Feature, Dev, QA, UAT, Prod). Here, we’ll use four branches: Feature, Dev, Test, and Prod to streamline deployments.
Implementation Steps:
1. Create a GitHub repository named after the Boomi process.
2. Add four branches: Feature, Dev, Test, and Prod.
3. Push changes from the local system to the Featurebranch.
4. Raise a pull request (PR) from Feature to Dev for merging.
5. Promote code through higher environments, triggeringGitHub Workflows at each PR merge.
6. Configure workflows in Dev, Test, and Prod branches via Actions > New Workflow > Set up Workflow (.yml file).
For secure authentication, use GitHub Secrets instead of hardcoding credentials (Settings > Secrets and Variables). Below is a sample workflow code that can be customized based on requirements.
Understand How GitHub Works:
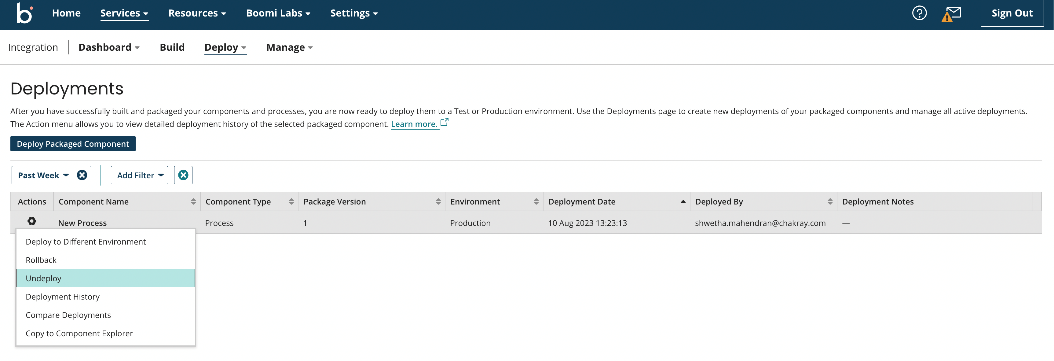
Boomi Deployments Tab:
Conclusion
Integrating CI/CD in Boomi significantly enhances efficiency, reduces manual intervention, and ensures reliable deployments. By leveraging Boomi AtomSphere APIs and GitHub Actions, teams can automate deployment processes, maintain version control, and improve overall integration quality. This approach ensures that software updates are delivered quickly, consistently, and with minimal errors, enabling businesses to stay agile in a rapidly evolving digital landscape.